Account
Sites
A site is one public web address you want Querywright to work on. Adding one is free; a site counts only when a scan of it succeeds.
A site is one public address: the scheme and the host, such as https://example.com. Everything in a site’s sections belongs to that site: its scans, pages, plans, copy, checks and performance. Querywright saves the site’s home address, not the path you pasted.
Before you start
- Use the exact address you mean.
https://www.example.comandhttps://example.comare different sites, and so arehttp://andhttps://. Use the one your pages are served from. - The address has to be public. Private and local addresses are refused.
- Adding a site claims nothing. It does not claim ownership of the domain, and no scan runs when you add it. Other Querywright accounts can research the same public site; their records are not visible to you, and yours are not visible to them.
Add a site
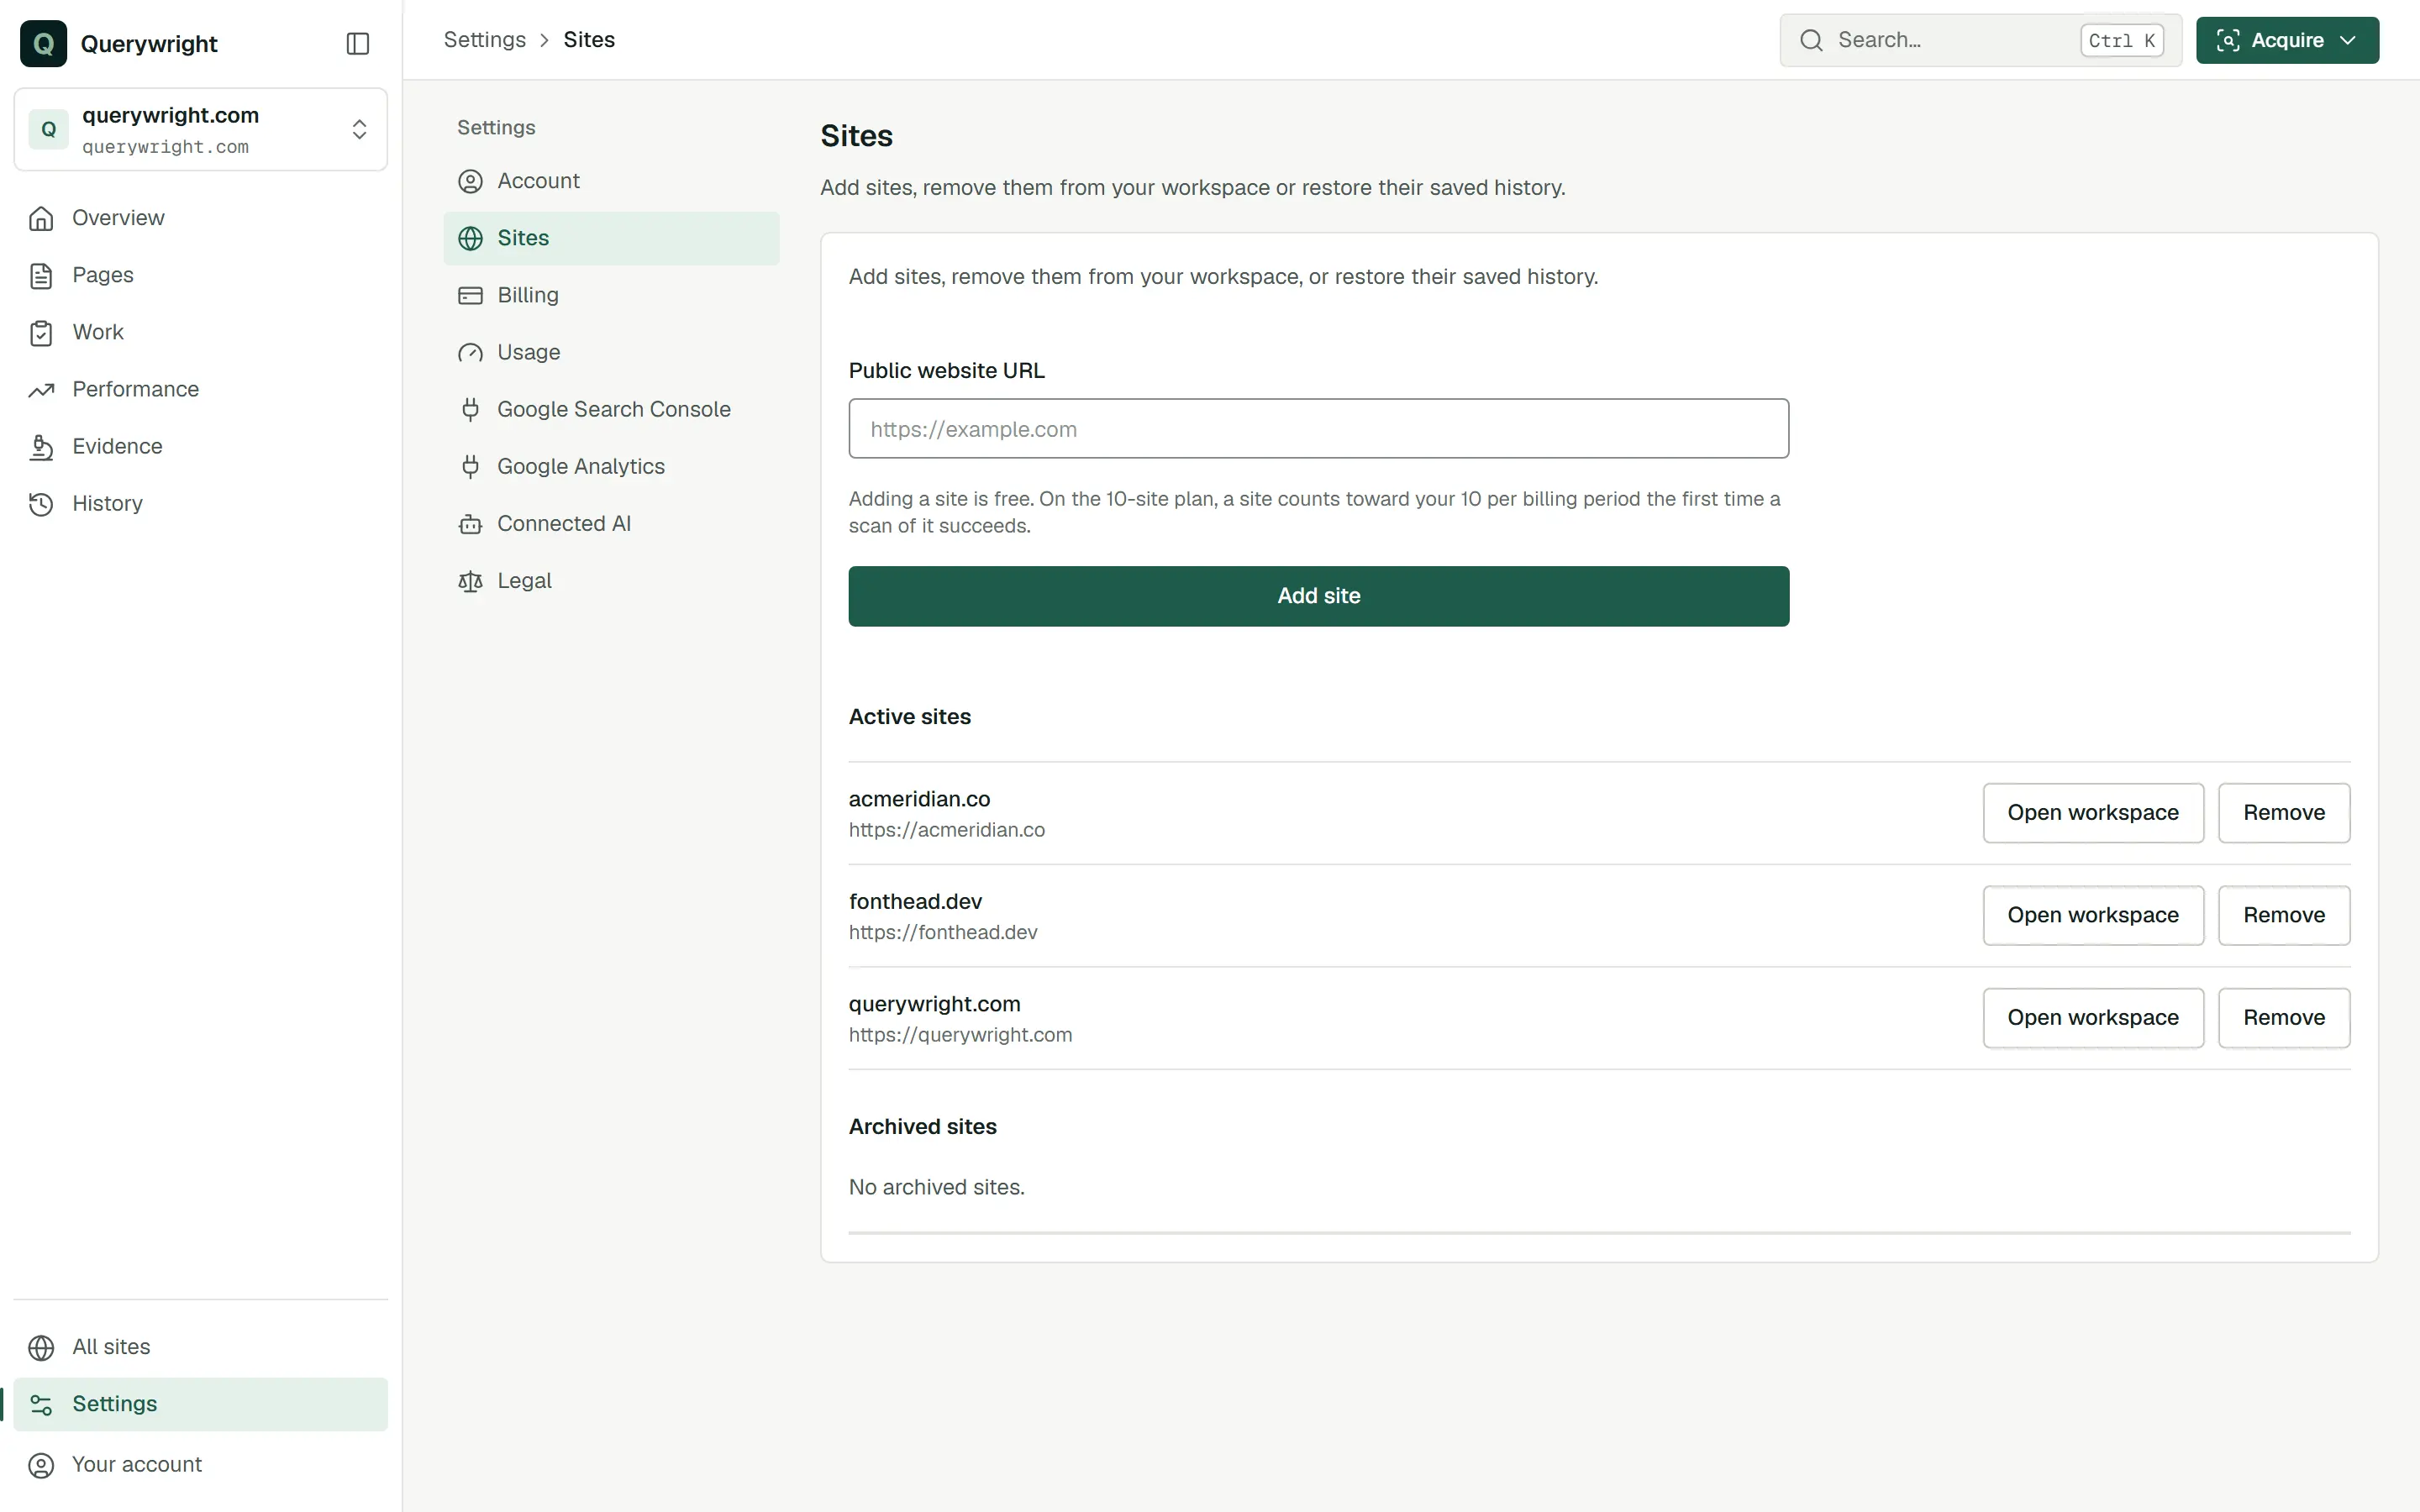
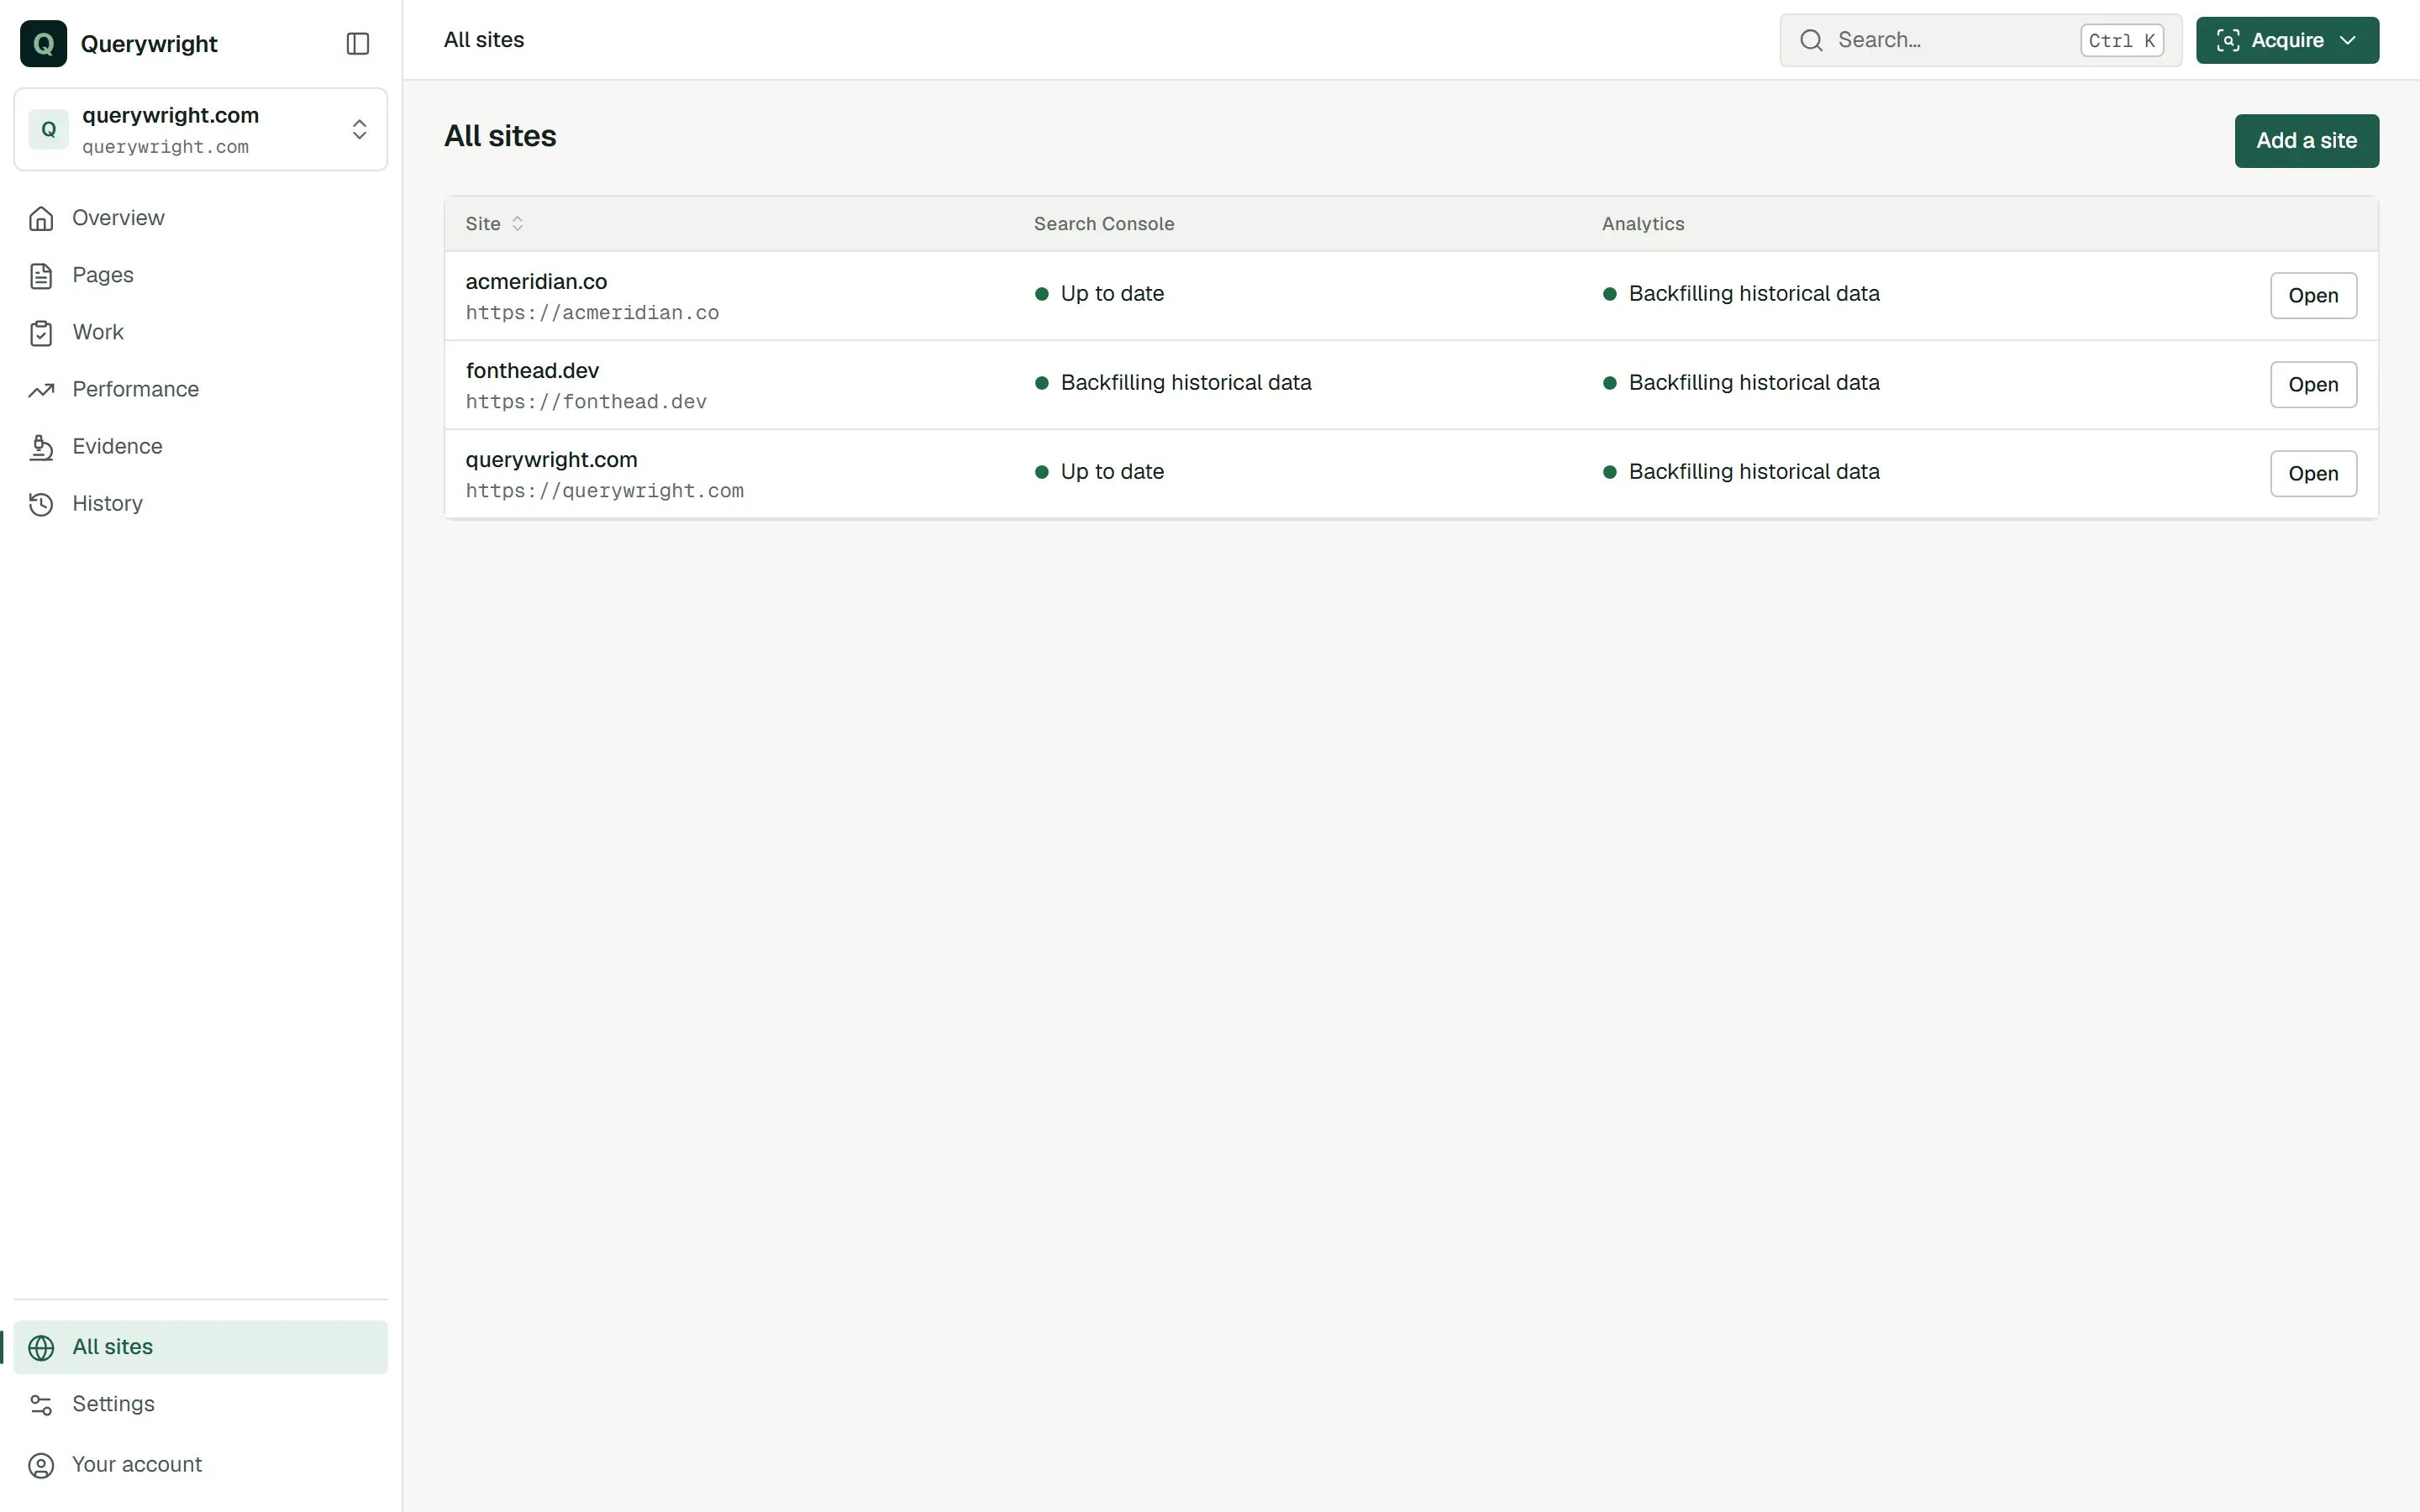
- Open Settings → Sites. Add a site, in the site switcher and on All sites, takes you there too.
- Paste the address into Public website URL.
- Press Add site.
The App confirms one of three outcomes, for example “example.com added to your workspace.”, “example.com is already in your workspace.”, or “example.com restored to your workspace with its existing history.” for a site you had removed.
During setup, the Site step is the same form. Adding your first site there moves you on to connecting your AI.
Switch between sites
- The site switcher at the top of the rail shows the current site’s name and host. Open it, type in Find a site…, and choose a site. You stay in the same section for the new site.
- All sites, at the bottom of the rail, lists every active site with its Search Console and Analytics state and an Open button.
- Settings → Sites has Open workspace beside each active site.
The site is part of the address in your browser, so a link you save or share opens the same site and section.
Remove a site
- In Settings → Sites, press Remove beside the site.
- Read the dialog: “Its history is kept and you can restore it anytime. Removing it does not return a site slot already used this billing period.”
- Press Remove site, or Keep site to stop.
The site moves to Archived sites. It leaves the site switcher and your lists, and its history and allowance records are kept. Removing a site never deletes data; deleting your account is a separate action in Settings → Account. See Your subscription.
Restore a site
In Settings → Sites, press Restore to workspace beside the site under Archived sites, or add its address again. It comes back with its history.
How sites count
Your plan includes 10 sites researched per billing period. The period is your Stripe billing period, not the calendar month.
- Adding, removing or restoring a site uses nothing.
- A site counts the first time a scan of it succeeds in the period.
- Scanning a site again in the same period doesn’t use another slot.
- A scan that is still running holds a slot until it finishes.
- Removing a site does not return a slot it already used.
- When a new billing period starts, every slot is free again and your history stays.
What you’ll see in the App
Settings → Sites has the add form, Active sites with Open workspace and Remove, and Archived sites with Restore to workspace.
Settings → Usage shows “Sites used: N of 10” for the current period and lists the sites that used a slot. See Allowances.
If something goes wrong
- “Enter a public website, not a private or local address.” or “Enter a public HTTP or HTTPS website without credentials.”: check the address and try again. See Common messages.
- Your AI says the site isn’t registered to your account: add that exact address in Settings → Sites, including
wwwif your pages use it. - Your AI says the site needs restoring: restore it under Archived sites.
- Your sites for this period are used up: see Allowances.
Last updated